The Definitive Synth Bass Guide – Calling All Bass Heads!
Bryan Peace
There’s nothing quite like feeling bass vibrate throughout your entire body. It is the most essential part in many music genres, particularly electronic music and hip hop. Synthesizers contribute heavily to the sound of these genres. And let’s face it: synth bass sounds and feels great. It’s like the circuitry of the synthesizer is connecting with the brain’s pleasure centers.
An Overview of Essential Synth Bass Sounds
There’s nothing quite like feeling bass vibrate throughout your entire body. It is the most essential part in many music genres, particularly electronic music and hip hop. Synthesizers contribute heavily to the sound of these genres. And let’s face it: synth bass sounds and feels great. It’s like the circuitry of the synthesizer is connecting with the brain’s pleasure centers.
Synths are capable of an incredible range of moods and low end textures. As your music production skills develop, familiarity with a variety of these sounds (and fluency creating them on different synthesizers) gives you more options for your tracks. Whether you need a bass line or something more textural, synths can fill up the low end in your tracks. Read on for an overview of essential synth bass sounds and details on how to make them for your tracks.
Minimoog Funk Bass
The Minimoog Model D forever changed the synth game. Released in 1971, it was the first synth to include a keyboard in a portable form. Bob Moog’s transistor ladder filter provided a thick, rubbery timbre. Keyboardists quickly learned how unique it sounded gliding between notes. Tracks like Pink Floyd’s “Shine On You Crazy Diamond” (with its mellow, brassy sound) and Dr. Dre’s “Nothin’ But A G Thang” (with its G-Funk whistle) demonstrated the Minimoog’s lead potential. It also happened to be very well suited to the low end.
Funk keyboard players in particular latched onto the Minimoog’s synth bass potential. Take a listen to funk-inflected classics like Parliament Funkadelic’s “Flashlight” to appreciate this meaty bass sound. A similar sound is used on perhaps the biggest album of all time, Michael Jackson’s “Thriller,” for the title track and “P.Y.T.”
How To Make It
To create this sound, there are plenty of Minimoog software emulations (one directly from Moog). But any synthesizer with sawtooth or square wave oscillators will do. The sound requires equal attention to patch design and performance. Start with a pair of sawtooth oscillators. Experiment with setting one an octave higher than the other, or make them the same but with detuning for some thickness. You can also try a square wave on one oscillator for a different tone.
Snappy envelopes are key to the sound. You want an immediate attack, so set that to zero, and a short decay, so set that to 9 or 10 o’clock. Start with sustain at about 12 o’clock and see how that sits in the mix when you’re playing longer notes. Adjust it higher if you want your tone to extend into the midrange, or keep it low if you only want low end. Release should be short, or about the same as your decay. Filter cutoff should be at or near zero. For the filter envelope (or “contour”) amount, start at about halfway. This provides a punchy transient that settles into a thick low end.
Performance and phrasing are also critical. The way they interact with the contour amount defines the sound. Funk basslines typically have “busier” parts (trills, grace notes, and faster staccato phrases) in the midrange. The transients from those notes add a punchy character from the contour amount. Funk basslines tend to settle into sustained notes toward the bottom end to fatten up the mix. You’ll notice in “Flashlight,” pitch bending adds that extra bit of funk. Use your synth’s pitch bend control, or route an LFO to the pitch and control the amount with the mod wheel for vibrato.
808 Sub Bass
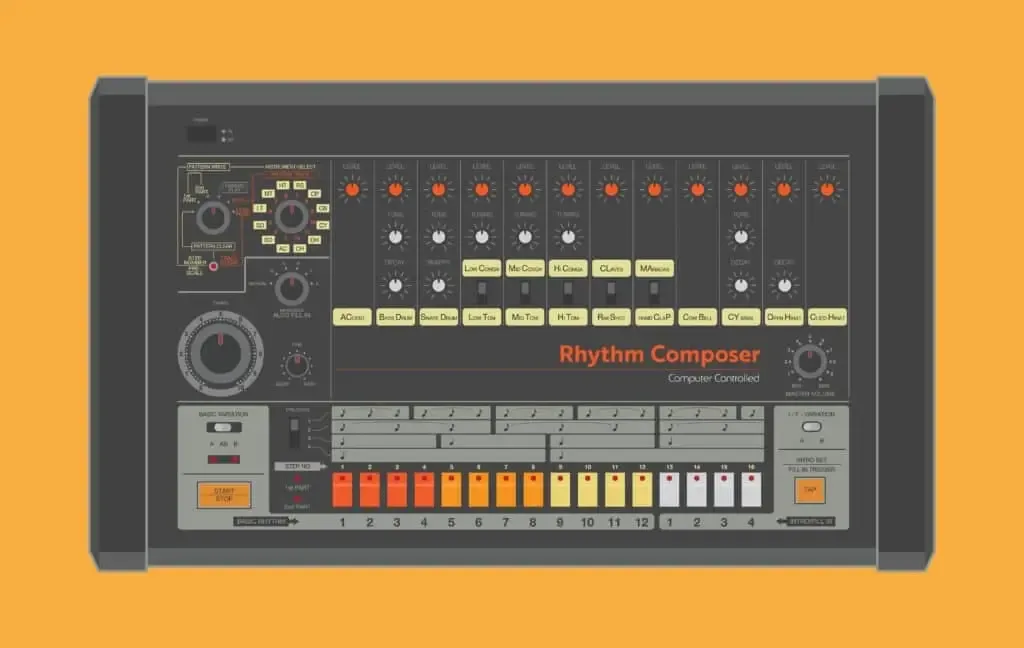
One of the most prominent synth bass sounds is the sub bass. Also referred to as “808s,” the name comes from its source: the Roland TR-808. The 808 is arguably the most iconic drum machine of all time. It was only in production from 1980 to 1982, yet its legacy looms large over hip hop and rap. Today you hear 808s all over pop music as well.
The Roland TR-808 Rhythm Composer
The 808 sub bass starts with the original TR-808 drum machine’s kick drum. Savvy producers cranked up the decay on its simple envelope. The result was a big, booming sound that rattled subwoofers and helped create beats for MCs to rap over. And while seminal rap records prominently feature the 808, countless classics feature the 808 (just check out this playlist).
How To Make It
Despite its deep influence, the 808 sub bass is fairly simple. The 808 kick used a sine wave for its sound source. A sine wave is a simple waveform. It only includes the fundamental frequency. When played in lower octaves, it emphasizes that chest thumping low end.
Good news: it’s easy to make an 808 sub bass on any synthesizer. Use a sine wave as your oscillator, create a simple envelope with a short attack and high sustain, play notes in the C0-C2 range (roughly 30-130 Hz), and you’re basically there. If your synthesizer doesn’t have a sine wave, try a triangle wave with a low pass filter cutting frequencies above 200 Hz.
Dubstep Wobble Bass
This guide would be incomplete without the dubstep wobble bass. This sound essentially defines the genre. In the early 2000s dubstep emerged from reggae dub and jungle music as a new dance music subgenre. By the early 2010s, dubstep broke into the mainstream. Producers like Skrillex saw commercial success blending melodic electro-house with rhythmic synth bass.
What distinguishes the dubstep wobble isn’t just its sound design, but how it’s used in a track. “The drop” is where the dubstep magic happens. Before the drop, you’ll typically hear several bars of synth risers ramping up the tension while hi-pass filters gradually remove the track’s low end. This creates contrast to emphasize the bass when it finally drops. And when it does, bass heads rejoice.
How To Make It
A dubstep bass sound comes from using a rhythmic low-frequency oscillator (LFO) to modulate the filter cutoff. Using a sine or triangle wave LFO creates the characteristic wobble effect. By syncing the LFO to the track’s tempo and using faster step lengths (quarter, eighth, or sixteenth notes), bass tones take over the track’s rhythm.
For more rhythmic bass lines, try changing up the modulation intensity and rate throughout the phrase. You can do this by tweaking the LFO step lengths manually when playing and recording. Another approach is using an auxiliary mod envelope that is synced to the track tempo and looped. Software synthesizers and DAWs allow you to draw complex modulation patterns into the grid. This gives you more control over how the filter opens and closes for more complex dubstep rhythms.
The sound often has a metallic timbre to cut through the mix. To create this sound, assign the tempo-synced modulation source to other patch parameters in addition to the filter cutoff. Synthesizers with FM oscillators or wavetables can help achieve the characteristic metallic sound. Try routing the same LFO or aux envelope modulating your filter to FM amount OR wavetable position. Enjoy the blissful vibrations that result.
Acid Bass
Like the 808, the acid bass comes from a classic synthesizer: the Roland TB-303. A relatively simple monophonic synth, the 303’s designers intended it to accompany keyboardists and guitarists. This didn’t catch on upon its release in 1981, and by the mid-80s, secondhand units were cheap. Eventually dance music producers saw their potential for creating psychedelic bass lines. Hence the name, acid bass. Today, the 303’s impact on dance music, particularly acid house and techno, is hard to overstate. Just check out these classic tracks.
The Roland TB-303 Bass Line Synthesizer
The filter’s timbre sets the sound apart. The 303 used a diode ladder filter design that was distinct from Bob Moog’s transistor ladder filter. It created a squelchy timbre very different from the Moog filter’s smooth, creamy sound. Also, the 303 lacks a keyboard. It’s not a performance synthesizer. You program it. So savvy producers “played” the filter by tweaking cutoff and resonance levels to add expression to a programmed phrase.
How To Make It
Creating an acid bass sound can be as simple as programming a step sequencer with the right bass line and plucky envelope. You’ll want a short attack, moderate decay and sustain, and short release. You don’t really even need a sequencer. Simply route MIDI from your DAW to the synthesizer for the same result.
For the specific timbre of the 303’s idiosyncratic filter, you’d need either an original unit or one of the 303’s many software or hardware emulations. But you can get close by experimenting with different filter pole response settings (try 12 or 18 db/octave rather than the standard 24). Find a sweet spot with the filter’s resonance level that works well with the bass line’s phrasing.
Reese Bass
Another classic synth bass sound is the Reese bass. The “Reese” name comes from the artist who popularized it. Reese was a side project from Detroit techno pioneer Kevin Saunderson. He created it when producing “Just Want Another Chance.” As tracks like ”Terrorist” by Renegade demonstrate, this sound helped define jungle and drum and bass.
So what does it sound like? The Reese is an evolving, chorused sound that results from detuned and/or out-of-phase oscillators. You typically hear it playing a gritty bass tone, where it’s used like a low end synth pad. It has a constant sense of movement. That movement is often undesirable in many genres, since movement in the low end can create mixing problems elsewhere. Lucky for us, experimental 90s producers threw the rule book out the window and created a new sound.
How To Make It
There are many ways to create a Reese bass. Saunderson has stated that he created it with a Casio CZ-5000 (an early phase distortion synth), tweaking it until he found something unique. Today’s synthesizers offer several approaches to getting its gritty, wobbly quality. Any synthesizer with saw or square waves can get you there. Start by loading up two oscillators, and detune until you get a beating, chorused sound.
This is a bass sound, so filter accordingly. Add a low-pass filter with cutoff starting around 300 Hz. Adjust to taste depending on your track’s mix. For the envelope, it’s a safe bet to start with organ-like settings (max decay and sustain, minimum attack and release). From there, tweak depending on what the bass line and overall track need. Remember, Reese basses have some grit to them, so try adding saturation or distortion. Like anything else with sound design, experiment until you like what you hear!
FM Bass
This bass sound comes from a few popular presets on the Yamaha DX7. The DX7 was a revolutionary synthesizer that brought Frequency Modulation (FM) synthesis to the masses in the 1980s. Some of the 80’s biggest hit songs feature bass lines built on this sound. “Danger Zone” by Kenny Loggins, “Take on Me” by A-Ha, “Take My Breath Away” by Berlin, and the Main Theme to Twin Peaks all prominently feature it.
It almost sounds like an electric bass guitar. FM synth sounds have complex harmonics. This results from frequency modulation that creates sidebands from carrier and modulator oscillators. It doesn’t follow the straightforward harmonic structures of sawtooth or square waves. With the right settings, this harmonic complexity resembles an electric bass’s metallic timbre. The similarity is even more pronounced when an electric bass is plucked hard or slapped.
How To Make It
To create an FM Bass sound, you obviously need to start with an FM synth. You can find plenty software emulations of the DX7. Luckily, emulations are often easier to program than the DX7 itself, since the DX7 was notoriously difficult synth to program. Your amplitude envelope should be snappy. Try a fast attack, medium decay, moderate sustain, and fast release. The twang comes from FM, so experiment with different ratios between carrier and modulator oscillators. More complex ratios will yield more metallic timbres. Many FM synthesizers include an FM amount control to set how audible the characteristic FM effect is. A trick to emulate the electric bass is using key velocity to modulate the FM amount. This makes the patch sound more metallic when you play the keys harder.
Cinematic Synth Bass
If you’ve been to movie theaters in the past 2 decades, you’ve probably heard a seat-rattling synth sound. This massive low end is used in trailers, during action sequences, and even in slower sequences. It helps build tension and sets a dramatic tone.
While certainly not the first to create this sound, Hans Zimmer perfected and popularized it. Zimmer’s scores for Christopher Nolan’s Batman trilogy, Inception, Interstellar, Blade Runner 2049, and more recently, Dune, all use the sound extensively. Some circles refer to it as the “Braaam” sound. This onomatopoeia comes from how it starts with a low, guttural growl then opens up to a brassy timbre. The sound often layers synths with brass samples like the tuba, or even stringed instruments like the cello.
How To Make It
Hans has appeared in interviews tinkering with these sounds on a massive Moog modular system. While pricey analog bass synths offer a shortcut, you don’t need one to create it. Any synthesizer with a saw or square wave and low-pass filter will do. Amplitude envelopes with medium settings are a good start. The right envelope depends on the effect you want the sound to have in your track. Slow growling synth bass will resemble a pad’s envelope. More aggressive, startling sounds require a snappier envelope.
For the filter, start with a low cutoff around 200 Hz (around 9 o’clock on most synths). From there, play with different cutoff and envelope settings to find the right amount of the “aam” in the “braaam.” Distortion effects are also key. DAWs include perfectly suitable stock distortion effects for this. There are several great distortion plugins on the market to get even wilder distorted tones. Compression can also help increase the sound’s perceived loudness for that extra punch. Finally, layering in low brass samples and low cello notes can add more cinematic texture.
Get Synth Bass That Rumbles with CUBE
In case this article hasn’t already made it obvious, we’re massive fans of synth bass at Lunacy Audio. As composers and producers, we love the power a well-crafted synth bass has in evoking a specific mood. And as music fans, we love the cathartic feeling of low end vibrating your body and soothing your mind.
That’s why we’ve packed CUBE with loads of bass sounds in its factory presets, including all of the above synth bass sounds and much more. Perfect for modern electronic, pop, and hip hop tracks and equally suited to movie, TV, and video game scores, CUBE’s synth bass sounds can add cinematic flair to your productions. But sometimes more is more, so if you’re still craving low end, Rumble is for you.
A premium CUBE expansion pack, Rumble gives you a hybrid sample library of massive synth bass sounds paired with earth-shattering percussion. Packed with thunderous percussion hits, growling analog synth bass, experimental grooves, and hard-hitting pulses, it’s perfect for modern productions that call for cinematic, seat-rattling low-end with precision, clarity, and punch.